


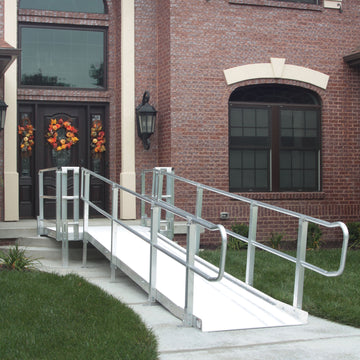


PVI Modular XP Ramp Systems is an ADA compliant ramp system that is specifically designed to last a lifetime, withstanding the elements and regular wear and tear with ease. Crafted from durable aluminum, these slip-resistant ramps are extremely sturdy, as well as surprisingly simple to set up due to they're coming preassembled.
Furthermore, the builder will be able to easily move and reconfigure the ramp even after it has been set up, making these ramps practical and convenient for those who anticipate moving or needing to take the ramps up or down.
Having been in business since 1991, PVI has remained stoutly committed to both family values and quality, both of which have undoubtedly lead to them becoming the world’s leading manufacturer of multi-fold aluminum wheelchair ramps.
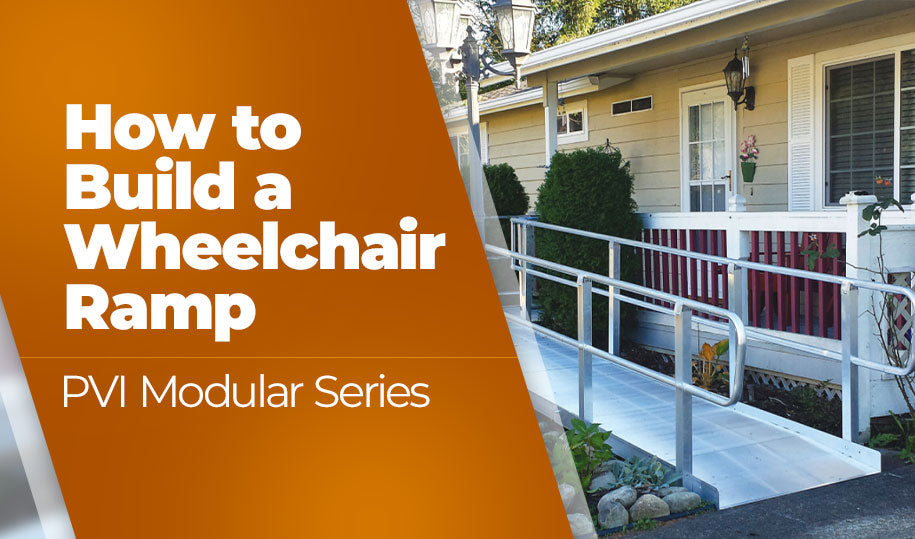
How to Build a Wheelchair Ramp: PVI Modular Series
Today we going to walk you through the steps that almost every modular ramp system will have, If at any time you have a question, feel free to refer to your owner's manual or call PVI for detailed answers.
1. Pre-Assembly

Once you receive your Modular XP Ramps system, find the owner's manual, read it thoroughly and place it in an accessible location.
PVI XP Modular Ramps Systems are designed to follow ADA guidelines regarding the slope angle of the ramp, size and shape requirements, as well as handrail design.
PVI Modular XP Owners Manual - PDF Download
2. Platform Assembly

- Find the parts list and start locating the parts listed within your packages. The packages are divided into platform components and ramp components and check them off your parts list. If you are missing any parts, contact PVI immediately so we can help locate them.
- It's time to start setting up the system as it will eventually look once assembled. Be sure to leave enough room in between sections so you can work around them.
- Layout each major component platform, ramp rails and legs. As it was drafted in the original drawing,
- PVI recommends the use of a flat surface for all assembly. Sawhorses are very helpful. If available, the platform handrail can be assembled in many different configurations.
- Layout handrail sections against platform.
- Line up the hole in the handrail platform post with the cage nuts in the platform
- Run the supplied five sixteenths by three quarter inch flange head bolts through the holes and tighten down using an extended ratchet.
- Repeat this for all handrail.
- In corners where handrails meet, attach a post quarter bracket.. Set off the post corner bracket in each side of the platform post and attach with self tapping screw.
- Go back over installed handrail and tighten down.
3. Installing Legs

- Determine best location for legs, that gives the platform maximum support.
- Place the leg attachment channel over the handrail post and align the holes, insert five sixteenths by three and one quarter hex bolts through slots and leg channel attach with washer and lock net and tighten down.
- You set the platform height measure from the bottom of the leg to the platform surface, loosen self-locking, that's to adjust and then tighten down.
- Repeat steps until all eggs for platform are installed, placed, assembled platform in required location.
4. Installing Ramp Attachment Clips

Wherever a ramp enters or exits a platform a ramp attachment clip is required, center clip in the openings ramps will be located, attached to platform with self tapping screws.
5. Ramp Assembly

- Layout sections of ramps according to the configuration. If the ramp is going to be connected to another ramp section, attach the two or more sections together using the two by four frame splice, attach splice to one of the ramps sections, using the supplied five sixteenths by three quarter carriage balls.
- Insert bolts into the square holes of the frame rail and through the frame splice, place the five sixteenths flat washer and five sixteenths self-locking that on the outside edge of the ramp sections and tighten down.
- Position the next ramp section and repeat these steps.
Attaching Ramp Handrails
It's time to attach the handrail and legs to your ramp sections, ramp handrail, now comes pre-assembled layout, ramp, handrail, assembly at the locations they will be attached.

- The entrance ramp section will require a left and right entrance handrail assembly at the bottom location.
- Attach the post to the ramp with five sixteenths by one carriage bolt washer and jam that on opposite side. Attach both bottom poles first and press down on post to line up top hole.
- Once you have installed a double post handrail assembly you will need to place splice into the end of the top handrail tube with the next single post handrail assembly line up top tube over the splice and then attach a single post in the same way, to connect the bottom tubes together and a splice in one tube and slide together, tighten down with Alan Wrench and rotate notches down.
- Next, insert a handrail splice into the tubes at the end of the ramp tubes.
- Attach and loops and tighten down handrail splices.
- Go back and tighten down all posts.
Attaching Upper ‘T’

- Place Upper ‘T’ at top section of each run of ramp.
- Attach self tapping screws in each corner of upper ‘T’ with the ramp run completely assembled position ramps at the required location.
Place Ramp Into Position

Where ramps attach to platforms, place ends of ramp on ramp attachment clips, make sure ramp is placed snug against landing surface set supplied level on platform and adjust leg heights so that all four sides are level tight and down platform legs
Attaching Legs To Ramps

- Attach legs at locations where jam nets are on ramp posts, placed washer in between jam and leg with the washer and lock that on opposite side of leg and just legs down to ground and tighten down block nets.
- Repeat steps for remaining legs.
- And then repeat these steps for remaining.
6. Review

Inspect your New Modular Ramp System
- Go over all bolts and check to make sure none were left loose, walk up and down the system and make sure that the legs are touching and stable.
- And sure, all handrails feel solid and stable.
- Check that the door at the top of the system can function properly while the system is designed to be maintenance free. We do recommend an inspection of all bolts, pavers, legs and handrails splices every three to six months.
- Also, be sure to check the platform with a bubble level to make sure there has been no settling of the system if you do find any maintenance needs. Be sure to fix right away before it is used again.
Purchase your PVI Modular XP Wheelchair Ramp from Rescue Supply Today!

Features & Benefits:
What Our Customers Are Saying:
Great Product!
Easy to put together, all parts included, quality product.
Sarah A. on Feb 09, 2021
Modular Ramp
Ordered the ramp and it was delivered on time. A couple of calls to the company regarding installation were answered immediately. Missing a part and it was shipped overnight so installation could continue. More than one person is required for installation. Watch the You Tube video ahead of time because makes it easier to understand the directions supplied. Great experience and I would recommend this company
Joe M. on Jan 29, 2021
Excellent Quality, Easy to Build
Easy to build and install, great sales service, and the stability of this ramp far exceeds the prior ramp on loan, no bounce.
Genevieve B. on Jan 27, 2021
Platform and Ramp
I am very pleased with my 5’by 5’ platform and the 14’ ramp , very easy assembly, excellent instruction to follow. I am limited to climbing and this setup made it possible to get in and out my home , I will not made it with out it.
Adil K. on Jan 23, 2021


